If you’re setting up a cold plunge filtration system, you’ll want a clear plan that balances flow, filtration, and sanitation so the water stays crisp and safe. Start by defining how often you’ll use it and the desired turnover rate, then choose a pump, filter media, and plumbing sized to meet that goal. Add a reliable sanitizer and monitoring sensors for consistency, and you’ll avoid common problems down the line—here’s how to assemble each piece.
Key Takeaways
- Calculate plunge volume and choose a pump sized to turn over the full volume every 1–2 hours, accounting for head loss.
- Sequence filtration: coarse mechanical pre-filter, fine cartridge or sand filter, then biological media (bio-balls/ceramic rings) for waste breakdown.
- Size plumbing and skimmers to support target flow, using 1.5–2″ pipes and isolation valves for maintenance access.
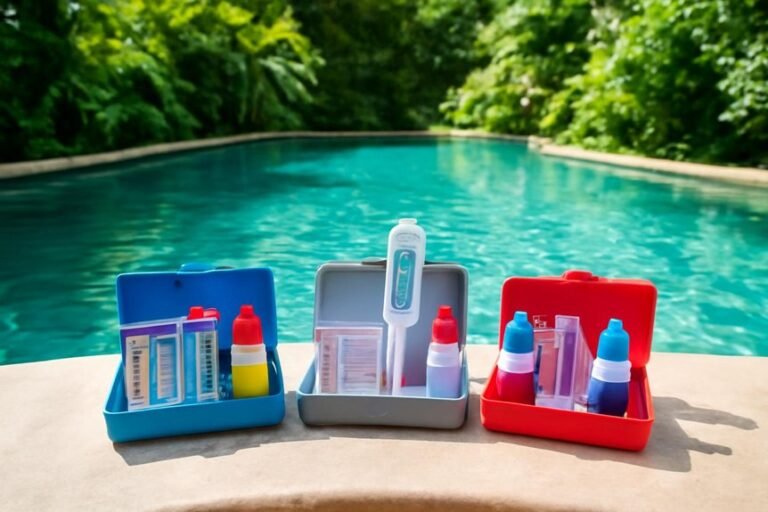
- Integrate sanitation (chlorine, bromine, salt electrolysis) plus optional UV/ozone, and monitor ORP/FC and pH regularly.
- Install a heat exchanger and temperature controller with flow and temperature sensors, plus alarms and safety interlocks.
Planning Your Cold Plunge Filtration Strategy
Because effective filtration begins with clear goals, you should start by defining how you’ll use the cold plunge and what water quality you want to maintain. Consider frequency of use, number of users, and whether it’s for recovery, therapy, or general wellness; those choices determine filtration demands. List acceptable clarity, turbidity, and microbial limits, then decide how strictly you’ll monitor chemistry. Map space constraints, noise tolerance, and maintenance capacity so your system matches practical realities. Estimate water volume and set a maintenance schedule that includes routine testing, media replacement, and sanitation protocols. Finally, budget for upgrades and backups, and document chosen parameters so you can evaluate performance, adjust procedures, and keep the plunge safe and consistent.
Choosing the Right Pump and Flow Rate
Selecting the right pump and flow rate is pivotal to keeping your cold plunge clean, efficient, and comfortable for users, so start by matching pump capacity to your plunge’s volume and intended turnover rate. Calculate your plunge volume in gallons or liters, then choose a pump that can cycle that volume through the system at least once every 1–2 hours, depending on use frequency. Account for head pressure from plumbing length, fittings, and filter resistance, since advertised flow drops with increased head. Opt for a variable-speed pump if you want flexibility—run faster for heavy use, slower for gentle circulation and energy savings. Verify electrical requirements, quiet operation, and ease of maintenance to guarantee reliable, long-term performance without surprises.
Selecting Filtration Media and Filter Types
Now that you’ve matched pump capacity to turnover needs, it’s time to pick the right filter types and media to keep water clear and safe. You’ll weigh mechanical filtration, which traps debris, against biological media that supports beneficial bacteria, and choose sizes and surface areas that fit your plunge volume and flow rate. Picking the proper combination — from pre-filters and cartridges to bio-balls or ceramic rings — will determine how effectively your system removes solids and processes ammonia, so plan media sizing to match both peak loads and maintenance habits.
Mechanical vs. Biological Filtration
When you compare mechanical and biological filtration side by side, you’ll see they serve distinct but complementary roles in a cold plunge system: mechanical media captures suspended debris and particles to keep the water clear, while biological media provides surface area for beneficial bacteria to establish and break down ammonia and nitrite into less harmful nitrate. You’ll choose mechanical stages to remove hair, leaves, and fine particulates before water reaches biological zones, preventing clogging and preserving bacteria habitat. Biological filtration, often slower, relies on stable flow, oxygen, and time to convert wastes; you’ll monitor ammonia and nitrite to confirm effectiveness. Together they maintain clarity and water chemistry, so design your plumbing to sequence mechanical removal first, then biological contact, for reliable, low-maintenance performance.
Media Selection and Sizing
Because the effectiveness of your cold plunge depends as much on the media as on the plumbing, you’ll want to match filter type and size to the water volume, expected load, and maintenance schedule. Choose mechanical media—pleated cartridges, sand, or diatomaceous earth—based on particle removal needs; cartridges suit small volumes and easy swaps, sand works for steady heavy-duty use, and DE captures the finest particles but needs careful handling. For biological filtration, include media with high surface area like bio-balls or ceramic rings to support nitrifying bacteria, especially if organic load is moderate. Size the filter to turn over the full volume every 1–2 hours, and oversize slightly to reduce strain. Plan media access for routine cleaning to keep performance consistent.
Sizing Plumbing, Valves, and Skimmers
Properly sizing the plumbing, valves, and skimmers for a cold plunge guarantees efficient circulation, reliable filtration, and easier maintenance down the line. You’ll size pipes to support turnover rate: calculate pool volume, choose a flow rate that achieves a full turnover in 30–60 minutes, then pick pipe diameters (typically 1.5–2 inches for residential plunges) that keep velocity moderate to reduce noise and friction loss. Select ball or gate valves for isolation and multiport valves for directional control, placing them for easy access and winterization. Choose skimmers rated for cold temperatures and matched to surface area so they capture debris without starving the pump. Use unions, threaded fittings, and clear labeling so you can service components quickly and avoid downtime.
Integrating Sanitation: Chlorine, Bromine, and Alternatives
Although cold plunges share many sanitation principles with pools and hot tubs, you’ll face unique challenges from low water temperatures, small volumes, and frequent user turnover, so choosing the right sanitizer and control strategy matters more than you might expect. You can use chlorine for its strong, fast-acting disinfection and wide availability, but maintain free chlorine at lower ppm and monitor pH carefully to avoid irritation. Bromine works well at cooler temperatures and stays effective longer, though it’s pricier and needs careful handling. Salt systems/saline electrolysis offer steady chlorination with less chemical handling, while UV and ozone provide excellent supplemental pathogen control without residuals. Combine a primary sanitizer with secondary methods, automated dosing, and regular testing to keep water safe and compliant.
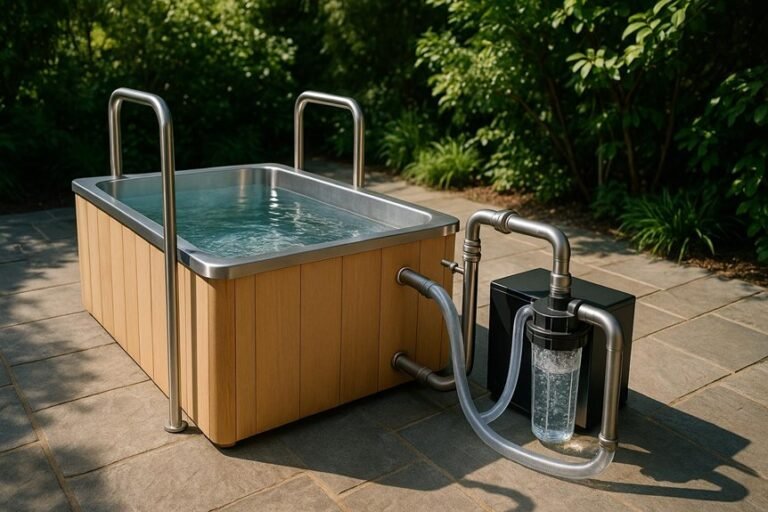
Setting Up a Heat Exchange and Temperature Control
You’ll start by choosing a heat exchanger that matches your plunge volume and flow rate, since material, plate vs. coil design, and thermal efficiency will determine how quickly you can shift water temperatures. Then position and insulate the exchanger and connecting pipes to minimize heat loss—placing it close to the pump and using foam or wrap insulation keeps performance consistent and energy use low. Finally, set up a temperature controller with properly placed sensors and clear hysteresis settings so the system maintains target temperatures reliably without rapid cycling.
Heat Exchanger Selection
Because a cold plunge relies on stable temperatures and efficient heat transfer, selecting the right heat exchanger is one of the most important steps in your system setup. You’ll choose between plate, shell-and-tube, and brazed-plate types based on flow rates, space, and maintenance needs. Plate exchangers are compact and efficient for low-to-moderate flow, while shell-and-tube suits higher volumes and easier cleaning; brazed plates give high performance in tight footprints but are harder to service. Match exchanger capacity to pump flow and desired temperature delta, and verify materials—stainless steel or titanium resist corrosion from chlorinated or saline systems. Consider pressure ratings, ease of access for future service, and compatibility with your chiller or heater controls to guarantee reliable, long-term temperature control.
Insulation and Placement
When you’re setting up heat exchange and temperature control for a cold plunge, thoughtful insulation and strategic placement are as important as selecting the right equipment; they determine how efficiently your system holds temperature, how much energy it consumes, and how easy it will be to service later. Insulate the plunge shell, pipes, and any exposed heat exchanger surfaces with closed-cell foam or high-R-value panels to reduce thermal loss and condensation. Place the heat exchange unit close to the plunge, minimizing pipe length and bends to cut heat gain and pump work, yet allow access for maintenance. Position the system in a shaded, ventilated area to avoid solar heating and to keep compressors and fans cool, improving reliability and lowering operating costs.
Temperature Controller Setup
Insulating the plunge and placing your equipment thoughtfully cuts heat gain and keeps components accessible, but to hold a steady bath temperature you’ll need a properly configured temperature controller and heat-exchange loop. First, choose a digital PID controller sized for your heater or chiller; PID tuning reduces overshoot and keeps swings small. Mount the sensor in water flow, away from heaters, to read true bath temperature. Integrate a stainless-steel heat exchanger with a pump that maintains consistent flow rates; higher flow improves transfer but increases pump load. Use safety interlocks and a high-limit thermostat to shut equipment off if temperatures stray. Calibrate sensors periodically, secure electrical connections in waterproof enclosures, and route plumbing to allow easy maintenance—this setup keeps your cold plunge steady and reliable.
Installing Sensors, Automation, and Monitoring
Now that your filtration hardware is in place, adding sensors and automation turns a cold plunge into a reliably monitored system that saves time and prevents problems; you’ll want to choose and position sensors, set up a controller, and configure alerts so the system can run with minimal hands-on intervention. Start with core sensors: water temperature, flow, and pressure, plus a conductivity or ORP probe to track water quality. Mount probes where they sample representative water, avoiding stagnant corners, and protect electrical connections from moisture. Use a programmable controller or home automation hub to log data, run pumps on schedules, and react to threshold breaches. Configure alerts via SMS or app, test fail-safes, and document settings so you’ll respond quickly if something goes wrong.
Routine Maintenance and Seasonal Care
Although the filtration and sensor systems will handle most of the day-to-day work, you’ll still need a routine maintenance plan and seasonal care checklist to keep your cold plunge running effectively and safely; regular attention prevents small issues from becoming costly repairs and preserves water quality and equipment life. Schedule weekly tasks like skimming debris, checking chemical levels, and inspecting the pump and filter pressure. Perform monthly duties: clean or backwash filters, lubricate seals, and verify automation logs. In spring and fall, drain partially for a thorough inspection, descale heat exchangers, and winterize external plumbing if temperatures drop below freezing. Keep a maintenance log, store spare parts, and review manufacturer guidance annually to guarantee warranty compliance and peak performance.
Troubleshooting Common Water Quality Problems
Routine care and seasonal checks will catch many problems early, but water-quality issues can still arise and demand focused troubleshooting. If you notice cloudiness, test for suspended solids and check the filter media; backwash or replace cartridges and inspect for bypass or leaks. For algae or green tint, raise free chlorine briefly, scrub surfaces, and reduce sunlight exposure with covers. If pH drifts, add measured pH increaser or decreaser slowly and retest after mixing; aim for 7.2–7.6. Persistent odors suggest organic load—clean the basin, shock the water, and verify biological filter performance. Low sanitizer levels often mean dosing errors or high demand; recalibrate feeders and confirm circulation rates. Keep clear logs of tests and fixes to spot patterns.
FAQ
Can I Use Tap Water Without Pre-Treatment for My Cold Plunge?
Can I use tap water in my cold plunge?
Yes, you can use tap water, but it’s not recommended due to potential contaminants.
What contaminants are found in tap water?
Tap water may contain chlorine, chloramine, minerals, and microbes that can negatively impact water quality and damage your equipment.
What treatment options should I consider before filling my cold plunge?
It’s advisable to use filtration, dechlorination, and possibly softening or UV treatment to ensure the water is safe and optimal for your cold plunge.
How Loud Will the Pump and Equipment Be During Operation?
How loud will the pump and equipment be during operation?
The pump and equipment will be moderately audible, producing steady hums, occasional clicks, and water flow noise.
What factors influence the noise level of the pump?
Placement, pump size, and insulation play significant roles in reducing sound levels.
How can I minimize noise from the pump?
To achieve quieter operation, choose low-noise models, mount them on vibration pads, and consider enclosing the equipment.
Can I Install the System Myself or Need a Licensed Professional?
FAQs: Can I Install the System Myself or Need a Licensed Professional?
1. Can I install basic filtration systems on my own?
Yes, if you are handy and have some experience, you can install basic filtration systems yourself. However, ensure you follow all instructions carefully.
2. When should I hire a licensed professional for installation?
It’s advisable to hire a licensed professional for tasks involving electrical hookups, complex plumbing, or when local permit requirements are necessary. This helps avoid safety risks and ensures compliance with local codes.
3. What are the risks of DIY installation?
Attempting to install systems without proper knowledge can lead to safety hazards, code violations, and potentially voided warranties. Always consider consulting a professional if you’re unsure.
Are There Insurance or Liability Considerations for a Home Cold Plunge?
Q: What insurance considerations should I have for a home cold plunge?
A: It’s important to review your homeowner’s policy to ensure it covers any potential risks associated with the cold plunge. You may need to add riders or increase your coverage limits for additional protection.
Q: Should I disclose the cold plunge to my insurance provider?
A: Yes, it’s essential to inform your insurance provider about the cold plunge. This transparency can help ensure that you are adequately covered in case of any incidents.
Q: What safety measures should I implement for my cold plunge?
A: Implement proper safety measures such as non-slip surfaces, clear signage, and supervision if children or inexperienced users are present. These precautions can help minimize risks and liability.
Q: Is it advisable to have guests sign a waiver before using the cold plunge?
A: Yes, having guests sign a waiver can limit your liability in case of accidents or injuries. This legal document can help protect you if a guest experiences any issues while using the plunge.
What Materials Are Safest for DIY Plunge Tubs and Surrounding Decking?
What materials are best for DIY plunge tubs?
For DIY plunge tubs, opt for nonporous and rot-resistant materials such as stainless steel, food-grade HDPE, or fiberglass. These materials ensure durability and safety, preventing issues like mold or decay.
What decking materials should I use around a plunge tub?
For decking surrounding a plunge tub, choose composite, pressure-treated cedar, or tropical hardwoods. These options are not only resistant to moisture but can also be treated with slip-resistant finishes for added safety.
What type of fasteners and joints are recommended for plunge tub projects?
Use marine-grade fasteners and ensure all joints are sealed. This will enhance the longevity and safety of your plunge tub setup by preventing water intrusion and corrosion.
Final Thoughts
You’ve now got a clear roadmap to design and maintain a reliable cold plunge filtration system: plan capacity and layout, choose a pump that achieves a 1–2 hour turnover, pair mechanical and biological media, size plumbing and skimmers correctly, and integrate sanitation (chlorine, UV, or alternatives) plus temperature control. Install sensors and automation, follow a routine maintenance schedule, and troubleshoot issues promptly. With consistent attention to flow, filtration, and chemistry, you’ll keep water clean, safe, and invigorating.