You’ll want a clear, reliable routine to keep your cold plunge safe, efficient, and long-lasting, and this guide walks you through the key steps from draining to refilling. Start by turning off power and skimming debris, then drain and scrub with a pH-neutral cleaner, rinse thoroughly, and apply a pool-grade sanitizer before refilling. You’ll also learn how to test and balance water, perform a shock treatment, and set weekly and seasonal maintenance so your plunge stays pristine — here’s how.
Key Takeaways
- Turn off power, remove debris, and fully drain the plunge following manufacturer safety steps.
- Scrub surfaces with a nonabrasive brush and pH-neutral cleaner, focusing on seams and textured areas.
- Rinse thoroughly, vacuum puddles, then apply an appropriate sanitizer and allow full contact time.
- Refill slowly, run circulation, test and adjust pH, alkalinity, and sanitizer levels before use.
- Perform weekly skimming and tests, monthly filter and seal checks, and seasonal full drains and deep cleans.
Why Regular Cleaning Matters for Your Cold Plunge
Because your cold plunge is a shared environment for water, skin, and air, regular cleaning prevents small problems from becoming serious ones. You’ll protect health by reducing bacteria, algae, and biofilm that thrive in cool, damp conditions; those contaminants can irritate skin or cause infections if you let them accumulate. Consistent maintenance preserves equipment too — pumps, filters, and surfaces last longer when debris and mineral buildup are removed on a schedule. Cleaning also keeps water clear and inviting, so you get the full recovery benefits without worrying about odors or cloudiness. Finally, routine care saves time and money by avoiding major restorative work; a little effort now prevents disruptive, costly repairs later.
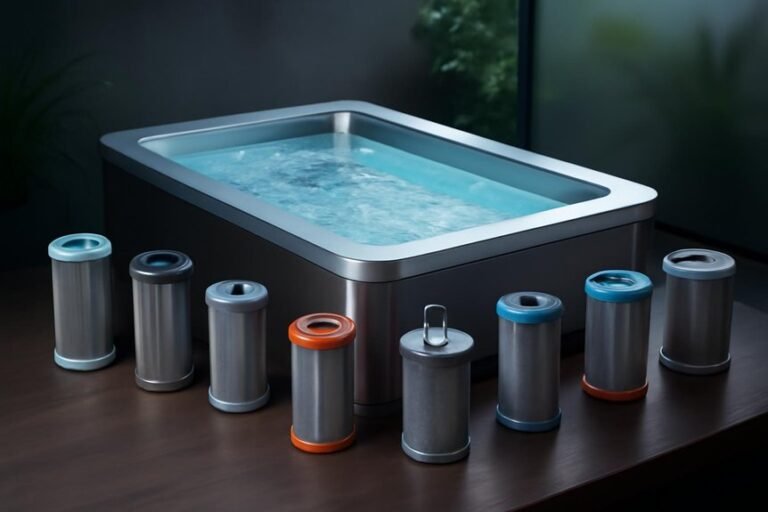
Supplies and Chemicals You’ll Need
Before you start, gather the right supplies and chemicals so you can work efficiently and protect both the plunge and your skin. You’ll need soft, non-abrasive brushes and microfiber cloths to remove grime without scratching surfaces, plus a plastic or nylon scraper for stubborn deposits. Have a bucket and wet/dry vacuum or submersible pump handy for controlled water handling. For chemicals, choose a pool- or spa-grade chlorine sanitizer and a pH increaser/decreaser to keep water balanced; include a non-chlorine oxidizer if you prefer. Use a surface-safe cleaner formulated for acrylic or wood, and a biodegradable disinfectant for liners. Don’t forget chemical test strips, gloves, safety goggles, and clear storage labels to prevent misuse.
Step-by-Step Draining and Debris Removal
Before you start, turn off the power to any pumps and heaters to keep yourself safe and protect the equipment. Use a skimmer or net to remove leaves, bugs, and floating debris so they don’t clog drains or scratch surfaces during emptying. Once the surface is clear, follow the manufacturer’s instructions to complete a full drain, checking that all water has been removed and any remaining sediment is swept out.
Turn off Power
1 clear step you must take before draining your cold plunge is to turn off the power to any pumps, heaters, lights, and control systems; doing so prevents electrical hazards, protects equipment from running dry, and lets you inspect components safely as the water level drops. Next, locate the main breaker or dedicated disconnect for the plunge and switch it off, then verify the control panel shows no active indicators. If your unit has a separate pump switch, turn that off too, and unplug any auxiliary devices. Use a non-contact voltage tester to confirm circuits are dead before touching wiring or covers. Label or note the original settings so you can restore them after cleaning, and keep the breaker off until the tub is fully drained and maintenance is complete.
Remove Surface Debris
With the power off and systems safely inert, you can start removing leaves, bugs, and other floating debris that will complicate draining and cleaning. Begin by skimming the surface with a fine-mesh net, working methodically from one side to the other so you don’t push debris into corners. For stubborn clumps use a soft-bristled brush to gather material toward the skimmer, then scoop it out. Empty your net frequently into a bucket to avoid reintroducing debris. If your plunge has removable strainers or baskets, lift and rinse them over a hose before setting them aside. Check inaccessible areas with a flashlight and long-handled tool to dislodge hidden debris. Proper surface removal speeds later steps and prevents drains from clogging during the next stage.
Complete Drain Process
Once you’ve cleared the surface debris and confirmed power and circulation systems are safely shut down, you’re ready to drain the plunge in a controlled, step-by-step way to prevent clogs and protect equipment. Start by locating the drain valve or using a submersible pump; place the hose or pump outlet away from foundations and toward an approved drainage area. Open the valve slowly to monitor flow, catching larger debris with a strainer or mesh bag to avoid pipe blockages. As the water level falls, use a wet/dry vacuum or manual siphon to remove remaining puddles and trapped particles from corners and behind steps. Inspect the drained basin for sediment, rinse remaining residue into the drain, and dispose of debris per local regulations.
Deep Cleaning and Surface Scrubbing
Before you start scrubbing, drain the plunge and remove any loose debris so you can see the surfaces clearly and plan your approach; deep cleaning and surface scrubbing are where you’ll eliminate biofilm, mineral buildup, and lingering contaminants that simple maintenance can miss. Start by selecting a nonabrasive brush or pad suited to your tub material, and pair it with a pH-neutral cleaner or a mild vinegar solution for mineral deposits. Work methodically from the top down, concentrating on seams, jets, and textured areas where grime accumulates. Apply cleaner, let it dwell briefly to loosen residue, then scrub with steady pressure, checking progress often. Rinse thoroughly to remove loosened material, repeat stubborn spots, and inspect under good lighting to verify an even, residue-free finish.
Proper Disinfection and Rinsing Techniques
After you’ve removed visible grime and rinsed the surfaces, it’s time to disinfect the cold plunge so you can reliably kill microbes and prevent biofilm from returning; choose an appropriate sanitizer for your tub material and follow label directions for concentration and contact time. Apply the sanitizer evenly, using a pump sprayer, soft cloth, or low-pressure hose, and make sure all crevices, seams, and fittings get treated. Allow the full contact time without rinsing prematurely — this is critical for efficacy. After contact time, thoroughly rinse with clean water to remove residual chemicals that could irritate skin or damage finishes. Finally, inspect drains, filters, and fittings for remaining deposits, re-clean any missed spots, and air-dry components before refilling.
Refill, Balance, and Shock Treatment
Once you’ve drained and rinsed the tub, you’ll refill it following the recommended water volume and temperature guidelines to guarantee consistent performance. Next, you’ll balance the water chemistry by testing pH, alkalinity, and sanitizer levels, adjusting each carefully so the environment is safe and comfortable. Finally, you’ll perform a shock treatment according to manufacturer instructions to eliminate residual contaminants, then retest and fine-tune levels before use.
Drain and Refill Steps
When you’re ready to refill the cold plunge, take a methodical approach: first inspect and clean the shell and fittings so you’re not trapping dirt or residues in fresh water, then slowly add water while monitoring levels to prevent splashing or air locks in pumps and lines. After filling to the recommended level, run the circulation system briefly to purge air and confirm drains and skimmers work correctly; watch for leaks and unusual noises. Measure temperature and add any manufacturer-recommended clarifiers or sequestering agents if needed. Allow filters to run and trap initial particulates, then perform a shock treatment per product instructions to eliminate contaminants introduced during maintenance. Record what you did and when, so future cleanings stay consistent and effective.
Water Chemistry Balancing
Start by treating your freshly filled plunge like a lab sample: test the water, then methodically bring pH, alkalinity, and sanitizer to their target ranges before you use the tub. After refill, measure total alkalinity first — it stabilizes pH, so adjust it to the recommended range (usually 80–120 ppm) with alkalinity increaser or decreaser. Next, set pH between about 7.2 and 7.6; use pH up or down products in small doses and retest after mixing. Finally, establish free chlorine or bromine to the advised level for routine use. Allow circulation and filtration to run while you wait for readings to stabilize, and document adjustments so you can reproduce successful treatments. Regular monitoring prevents scale, corrosion, and microbial growth.
Shock Treatment Procedure
After you’ve brought alkalinity, pH, and sanitizer into their target ranges, it’s time to apply a shock treatment to thoroughly oxidize contaminants and restore water clarity and safety; this step comes after balancing because shock works best at the correct pH and alkalinity. First, choose a shock compatible with your sanitizer—chlorine shock for chlorine systems, non-chlorine oxidizer for bromine or copper. Calculate dose based on volume and manufacturer instructions, then dissolve granular shock in a bucket of water if required. With circulation running, pour the solution around the perimeter to distribute evenly, avoid direct contact, and keep covers off for aeration. Wait the recommended time, retest sanitizer residuals, and only use the plunge when levels return to safe ranges.
Weekly, Monthly, and Seasonal Maintenance Schedule
Because consistent care keeps your cold plunge safe, efficient, and long-lasting, you’ll want a clear weekly, monthly, and seasonal routine that balances simple tasks with occasional deeper maintenance. Weekly, skim debris, test and adjust sanitizer and pH, wipe down surfaces, and run the filtration system per manufacturer recommendations; these small steps prevent buildup and keep water chemistry steady. Monthly, inspect seals, clean or replace filters, vacuum the basin, and perform a more thorough surface scrub to remove biofilm. Seasonally, plan a full drain and deep clean, inspect all plumbing and heater elements, and replace worn components before heavy use periods; if you store the unit, winterize per guidelines. Keep a log so you track actions and spot trends early.
FAQ
Can I Use a Pressure Washer to Clean the Plunge Interior?
FAQ: Can I use a pressure washer to clean the plunge interior?
Yes, you can use a pressure washer, but it’s important to proceed with caution. Stick to a low-pressure setting and maintain distance from the surface to avoid damage.
FAQ: What precautions should I take when using a pressure washer?
Always test a small area first to ensure there’s no adverse effect. Avoid spraying directly on delicate surfaces, seals, electrical components, and trim to prevent any damage.
FAQ: What type of pressure should I use for cleaning?
Opt for a low-pressure setting to protect delicate surfaces. High pressure can cause harm, so it’s best to err on the side of caution.
How Do I Remove Mineral Scale Buildup Effectively?
FAQ
1. How can I effectively descale mineral buildup?
To descale mineral buildup, soak the affected area in vinegar or citric acid. After soaking, gently scrub with a nonabrasive brush, rinse thoroughly, and then perform a sanitizer shock.
2. What should I do if the scale buildup is stubborn?
For stubborn scale, it’s best to use a commercial descaler. Always follow the label instructions and safety precautions to ensure effective and safe removal.
3. What tools do I need for descaling?
You will need vinegar or citric acid for soaking, a nonabrasive brush for scrubbing, and a sanitizer for the final step. Additionally, if using a commercial descaler, ensure you have it on hand as per the needs of the scale buildup.
Are Natural or Homemade Cleaners Safe for Sanitizing?
Are natural or homemade cleaners effective for sanitizing?
Natural or homemade cleaners can assist with cleaning, but they are not fully reliable for sanitizing. For effective disinfection, it’s recommended to use EPA-registered or pool-grade sanitizers.
What should I use for safe sanitizing?
To ensure safety and effectiveness in sanitizing, opt for EPA-registered sanitizers. These products are specifically designed to eliminate germs and pathogens.
How can I avoid damage when using sanitizers?
Always follow the manufacturer’s guidance when using sanitizers to prevent damage to surfaces. Proper application is key to achieving effective disinfection without harming your surfaces.
What’s the Best Way to Winterize an Outdoor Cold Plunge?
FAQ 1: How do I properly drain my outdoor cold plunge for winter?
To winterize your outdoor cold plunge, start by draining all the water completely. Make sure to dry the interior thoroughly to prevent any moisture buildup that could lead to freezing or mold growth.
FAQ 2: Should I insulate or remove the equipment during winterization?
Yes, it’s advisable to either remove or insulate the equipment to protect it from freezing temperatures. This will help maintain the integrity of the equipment and ensure it remains in good working condition for the next season.
FAQ 3: Is it necessary to add antifreeze to the lines?
Adding antifreeze to the lines is recommended if you live in an area with extremely cold temperatures. This helps prevent any residual water from freezing and causing damage to the plumbing system.
FAQ 4: What steps should I take after covering the plunge for winter?
Once you’ve securely covered the plunge, store any removable parts indoors to protect them from harsh weather. It’s also a good idea to check on the plunge periodically throughout the winter to ensure there are no issues with freeze damage or mold.
Can Pets or Children Safely Use the Plunge After Cleaning?
FAQ: Can kids use the plunge after cleaning?
Yes, children can safely use the plunge after it has been thoroughly rinsed, chemicals neutralized, and water parameters tested. It’s important to supervise them closely and ensure they do not have any open wounds before allowing them to play.
FAQ: Is it safe for pets to use the plunge after cleaning?
Pets can use the plunge after you have rinsed it well and confirmed that the water is safe. Always supervise your pets and make sure they do not have any open wounds or risk of ingestion.
FAQ: What should I do before allowing kids or pets to use the plunge?
Before allowing kids or pets to use the plunge, ensure that you have completed a thorough cleaning, neutralized any cleaning chemicals, and refilled the plunge with safe water. It’s also advisable to wait for the recommended dwell time before use.
FAQ: What precautions should I take while kids or pets are using the plunge?
While kids or pets are using the plunge, it’s crucial to supervise them closely. Ensure they are not ingesting water and that they do not have any cuts or open wounds that could be aggravated by the water.
Final Thoughts
Keeping your cold plunge clean protects your investment and guarantees a safe, revitalizing soak every time. Follow the draining, scrubbing, sanitizing, and rinsing steps, then refill and balance water chemistry before a shock treatment to kill lingering contaminants. Stick to the suggested weekly, monthly, and seasonal checks to prevent buildup and equipment issues, and always use recommended cleaners and PPE. With routine care you’ll extend the unit’s life and maintain consistently hygienic, enjoyable cold immersion sessions.