You’ll want to pick the right pump and prepare the site carefully, because proper flow, head pressure, and secure mounting determine how well your cold plunge performs. Follow safe plumbing practices and GFCI-protected electrical wiring, seal fittings correctly, and plan routine maintenance to avoid leaks and motor wear. I’ll walk you through choosing components, making reliable connections, and testing the system so your plunge runs efficiently — and what to check if something doesn’t go as planned.
Key Takeaways
- Select a pump sized for your plunge’s GPM and total dynamic head to achieve a 30–120 minute turnover time.
- Prepare a level, vibration-damped mounting surface near a GFCI-protected power source with 6–12 inches clearance.
- Dry-fit PVC or flexible hoses, use PTFE tape or pipe dope on threads, and install unions for future servicing.
- Wire the pump to a dedicated circuit with proper grounding and GFCI protection, or hire a licensed electrician.
- Prime and run the pump, check for leaks, verify flow with a bucket/timer, and adjust speed or valves for quiet, consistent circulation.
Choosing the Right Pump for Your Cold Plunge
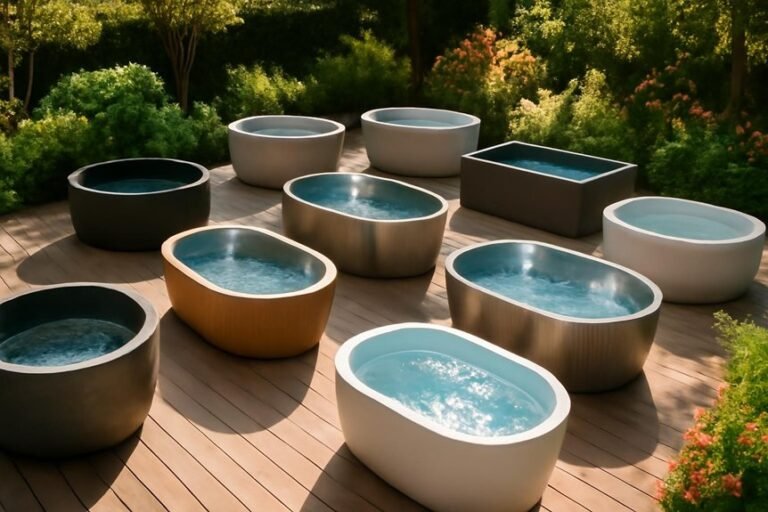
When you’re choosing a pump for your cold plunge, start by matching its flow rate and head pressure to the size and layout of your tub — a pump that’s too weak won’t circulate or filter the water effectively, while one that’s oversized can waste energy and create unnecessary turbulence. You’ll assess gallons per minute (GPM) needed to turn over the entire volume within a target time, typically between 30 minutes and two hours, and determine total dynamic head (TDH) based on plumbing length, fittings, and elevation. Consider pump efficiency, material compatibility with cold water and any sanitizers, and whether a variable-speed model could save power while reducing noise. Finally, check manufacturer specs, warranty terms, and reviews to guarantee reliable, long-term performance.
Tools and Materials You’ll Need
Before you start the install, gather a concise kit of tools and materials so you won’t be stopping mid-job to hunt for parts; this saves time and reduces the chance of mistakes. You’ll need a screwdriver set (flat and Phillips), adjustable wrench, pliers, and a pipe wrench for larger fittings. Include plumber’s tape (PTFE), thread sealant, and silicone sealant rated for potable water. Have hose clamps, suitable flexible hose or PVC pipe, and appropriate fittings or adapters matched to your pump’s inlet/outlet. Bring a voltage tester, GFCI outlet or breaker, and properly rated extension cord only if manufacturer allows. Keep replacement O-rings, mounting screws, and a small torch or heat gun for shrink fittings. A bucket and towels help manage water.
Site Preparation and Mounting the Pump
Pick a flat, stable location close to the cold plunge and within reach of a protected power source so you can mount the pump securely and keep hoses short. Clear debris and level the surface with pavers, a concrete pad, or a prefabricated mounting plate to prevent vibration and sinking over time. Leave enough clearance around the unit for airflow and future maintenance, typically 6–12 inches, and guarantee the area won’t collect standing water. If mounting to a wall or frame, use appropriate anchors and a vibration-damping bracket to reduce noise and stress on connections. Verify the electrical outlet is GFCI-protected and that cord routing won’t create trip hazards. Finally, test the mounted pump for stability before proceeding to plumbing.
Plumbing Connections and Leak-Proofing
Since a reliable plumbing setup is what keeps your cold plunge circulating and leak-free, you’ll want to plan each connection carefully and work methodically, using the right fittings, thread sealant, and flexible hose to accommodate slight movement and reduce stress on joints. Start by dry-fitting PVC or braided hoses to confirm lengths and orientations; mark and cut squarely to avoid gaps. Use PTFE tape or pipe dope on threaded joints and tighten to manufacturer torque specs to prevent overtightening. Install unions or quick-disconnects for future servicing, and add a braided flex line between rigid sections to absorb vibration. Pressure-test the system at operational pressure, inspect all joints for weeping, and retighten or re-seal as needed. Finish with drip trays and visual access for routine checks.
Safe Electrical Wiring and Grounding
Before you connect any wires, make certain you choose the proper dedicated circuit and breaker size for your pump to prevent overloads and nuisance trips. You’ll also need to follow approved bonding and grounding methods, using the correct gauge wire, grounding conductor, and secure connections to metal parts so the system stays safe under all conditions. If you’re unsure about local code requirements or the exact setup, consult a licensed electrician — it’s the safest way to guarantee everything’s installed correctly.
Proper Circuit Selection
Selecting the proper circuit for your cold plunge pump is critical to safety and performance, so you’ll want to match the electrical capacity, protection, and grounding to the pump’s specifications and local code requirements. Check the pump’s nameplate for voltage, full-load amperage, and recommended breaker size; use a dedicated circuit when the manufacturer specifies it, since shared circuits can cause nuisance trips or overloads. Choose conductor size based on ampacity tables and circuit length to limit voltage drop, and install a correctly rated circuit breaker or fuse to protect wiring. Use GFCI protection where codes require it near water, and confirm all components meet local electrical code. If you’re unsure, consult a licensed electrician to guarantee compliance and safety.
Bonding and Grounding Methods
When you’re wiring a cold plunge, bonding and grounding are essential practices that reduce shock risk and guarantee the electrical system behaves predictably under fault conditions; they connect metal parts and conductive components to a common grounding system so stray currents have a low-resistance path to earth. You’ll bond pump housings, metal fittings, and barrier frames with a continuous conductor, usually a green or bare copper wire, fastening it with listed clamps to assure low impedance. Grounding ties the equipment to your home’s grounding electrode system, using appropriately sized conductors and secure terminations at the grounding bus or rod. Always follow local code for conductor size, connection methods, and testing. If you’re unsure, hire a licensed electrician to confirm continuity and proper bonding resistance before using the plunge.
Startup, Testing, and Flow Adjustment
Now that the wiring’s secure, you’ll power the system for the first time and watch for any abnormal sounds or warnings from the pump. As it runs, inspect all fittings and seals closely for leaks, tightening connections as needed while the unit is pressurized. Finally, adjust the pump flow to the recommended rate for your cold plunge, testing water movement and temperature until the circulation is steady and within spec.
Initial System Power-Up
Before you apply power, take a moment to review your plumbing connections, check that all unions and clamps are tight, and confirm the pump and control panel are mounted securely, because a careful visual inspection prevents common startup problems and makes the initial testing smoother. With the breaker still off, set any manual valves to their start positions and verify the system is primed per the manufacturer instructions. Turn power on briefly to the control panel, observe for correct indicator lights and control responses, then start the pump on low speed to watch flow behavior. Listen for unusual vibrations or motor noise, monitor amperage against nameplate values, and gradually increase speed while checking pressure and flow. Record readings and adjust until stable performance is reached.
Leak and Seal Checks
Because a properly sealed system prevents most startup failures, you should begin leak and seal checks as soon as the pump runs and flow routines are established. Inspect all visible joints, unions, and hose clamps for dampness, then feel fittings for moisture while system pressure is moderate. Watch for dripping, slow seepage, or wet trails around the pump base, filter housing, and connection points. Tighten loose clamps incrementally; avoid over-tightening plastic fittings. Check O-rings and gaskets for nicks or misalignment, lubricating with manufacturer-approved grease before reseating. Verify that threaded connections use proper tape or sealant and that quick-connects fully engage. Run the system for at least 15–30 minutes while monitoring; mark any trouble spots to retest after cooling and vibration cycles. Address leaks promptly to protect equipment and water quality.
Adjusting Pump Flow
With the system sealed and initial leaks addressed, you’ll move on to setting and testing pump flow so the cold plunge circulates correctly without stressing components or compromising water quality. Start by powering the pump briefly to purge air; listen for steady motor sound and watch for consistent stream through return lines. Check manufacturer flow specs, then measure output with a bucket and timer or a flow meter to confirm rates. If flow’s too high, reduce via pump variable speed control, valve throttling, or adjusted fittings; if too low, inspect for clogs, verify pump head and riser height, and guarantee impeller is clear. Run the system for several hours, recheck temperatures and turnover rate, and fine-tune until circulation is quiet, stable, and within recommended ranges.
Maintenance, Troubleshooting, and Longevity Tips
Once you’ve got your cold plunge pump installed and running, regular maintenance and prompt troubleshooting will keep it performing reliably and extend its lifespan, so it pays to establish a simple routine you can stick to. Check filters weekly and clean or replace them as recommended, inspect seals and hoses monthly for cracks or leaks, and keep electrical connections dry and secure. If flow drops, rule out clogs, airlocks, or impeller damage; prime the pump and clear debris before assuming failure. Listen for unusual noises and monitor vibration, because early detection prevents costly repairs. Winterize if temperatures drop, following manufacturer steps to drain and protect components. Finally, log maintenance actions and parts replacements to track wear and plan timely upgrades.
FAQ
Can I Use the Pump for Hot Tubs or Only Cold Plunges?
FAQs: Can I Use the Pump for Hot Tubs or Only Cold Plunges?
1. Can I use my pump for hot tubs?
Yes, you can use the pump for hot tubs if it is rated for higher temperatures and made of corrosion-resistant materials. Always check the specifications before using it in hot water.
2. What should I look for in a pump for hot tubs?
Ensure the pump has a high-temperature rating and is constructed from materials that can withstand corrosive conditions. This will help prevent damage and ensure optimal performance.
3. What if my pump isn’t rated for hot water?
If your pump isn’t designed for hot water use, it’s best to avoid using it in hot tubs. Instead, consider investing in a heat-rated pump specifically designed for higher temperatures to avoid potential damage.
How Loud Will the Pump Be During Continuous Operation?
How loud is the pump during continuous operation?
The pump operates at a moderate noise level, producing a steady hum with occasional vibrations.
What factors affect the noise level of the pump?
Noise can be more noticeable if the pump is undersized, poorly isolated, or placed on hard surfaces.
How can I reduce the noise from the pump?
Using isolation pads can help dampen sound and vibrations, leading to a quieter operation.
Are There Eco-Friendly Pump Options for Lower Energy Use?
FAQ 1: What types of eco-friendly pumps are available?
You can choose from variable-speed pumps, brushless DC models, and high-efficiency ECM pumps. These options are designed to reduce energy consumption and improve overall efficiency.
FAQ 2: How do eco-friendly pumps help with energy savings?
Eco-friendly pumps typically operate at lower energy levels, which reduces overall power draw. They often include smart controls that allow users to schedule and monitor usage for optimal energy efficiency.
FAQ 3: Are eco-friendly pumps quieter than traditional pumps?
Yes, many eco-friendly pump models, such as variable-speed and brushless DC pumps, are designed to run more quietly compared to traditional pumps. This makes them a great choice for residential and commercial settings where noise reduction is a priority.
FAQ 4: Can I optimize the performance of an eco-friendly pump?
Absolutely! Many eco-friendly pumps come equipped with smart controls that enable you to monitor and adjust their performance, ensuring they operate efficiently and effectively with minimal energy usage.
Can I Automate Temperature Control With the Pump System?
FAQ: Can I automate temperature control in a pump system?
Yes, you can automate temperature control in a pump system by integrating a thermostat or a programmable controller with your pump and heating or cooling units.
FAQ: What components are needed for temperature automation?
To automate temperature control, you’ll need a thermostat, a programmable controller or smart relay, and temperature sensors to provide feedback for maintaining desired temperature levels.
FAQ: How do I set temperature targets and schedules?
Once you have the necessary components, you can set your temperature targets and enable schedules through the programmable controller or smart relay, allowing for automated adjustments based on your preferences.
FAQ: Is it safe to automate temperature control?
Yes, automating temperature control enhances safety and consistency by ensuring that temperatures remain within set parameters without manual intervention.
What Warranties or Service Plans Should I Expect?
What type of warranty should I expect with my purchase?
You can typically expect a limited manufacturer’s warranty that covers parts and labor for 1 to 3 years. This warranty may vary based on the manufacturer and specific product.
Are extended service plans available?
Yes, many manufacturers offer optional extended service plans that provide additional coverage beyond the standard warranty. It’s important to review the terms and conditions of these plans.
What should I check regarding maintenance or service contracts?
When considering maintenance or service contracts, check what is covered, any exclusions, transferability options, response times for service requests, and whether installation or regular tune-ups are included.
How do I find out about warranty transferability?
Warranty transferability varies by manufacturer; some warranties can be transferred to new owners while others cannot. Always verify the terms with the manufacturer or retailer before purchasing.
Final Thoughts
You’ve now got the essentials to install a cold plunge pump: pick a pump that meets your flow and head requirements, gather proper tools and fittings, level and mount the unit, make watertight plumbing connections, and guarantee GFCI-protected wiring with correct grounding. Start the pump briefly to purge air, check for leaks, and fine-tune flow. Keep up routine filter and seal checks, address issues promptly, and your pump will deliver reliable, safe cold-plunge performance for years.